「Wi-Fi setup for Mac OS X」の版間の差分
| 1行目: | 1行目: | ||
[[Information Technology Team]] > [[Connection to Wi-Fi]] > [[Wi-Fi setup for Mac OS X]] | [[Information Technology Team]] > [[Connection to Wi-Fi]] > [[Wi-Fi setup for Mac OS X]] | ||
| + | |||
| + | {| class="wikitable" | ||
| + | | [[Mac OS X の無線設定例|日本語]] | ||
| + | |} | ||
__TOC__ | __TOC__ | ||
2013年3月21日 (木) 19:40時点における版
Information Technology Team > Connection to Wi-Fi > Wi-Fi setup for Mac OS X
| 日本語 |
1 Certificate installation
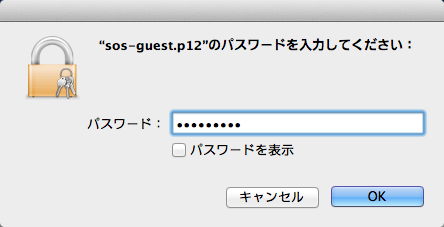
- Double-click the certificate file.
- Enter the authentication system login password in the “Password” field.
2 Connection to Wi-Fi network
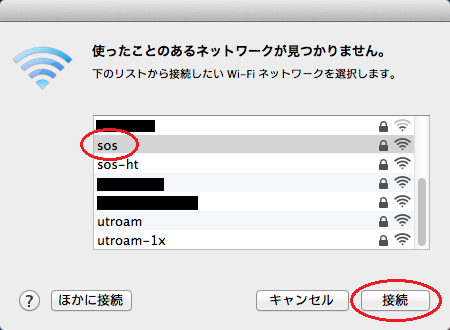
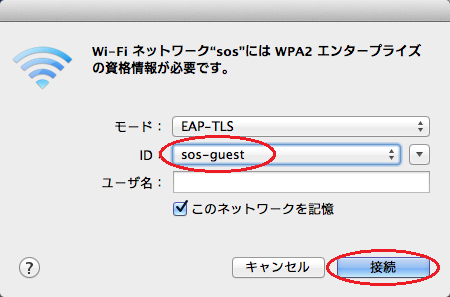
- When the screen saying “Any networks that have been used cannot be found” appears, select “sos” from the list and click [Join].
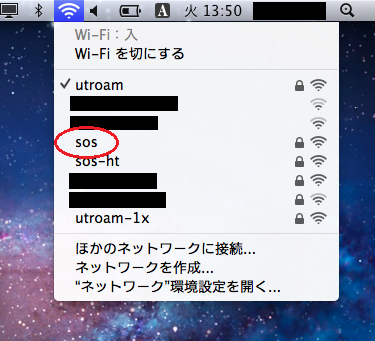
- If the above screen does not appear, click the Wi-Fi icon in the menu bar and select “sos”.
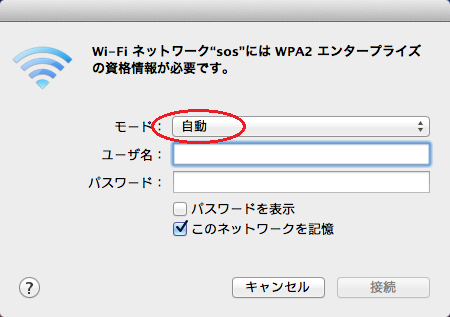
- Set the mode to “EAP-TLS” (this setting changes the subsequent setting items).
- Click the ID and select the installed certificate.
- Leave the “Username” field blank and click [Join].
- If authentication has failed, enter the account name (10-digit Universal ID for an individual user certificate or “sos-guest” for a guest certificate) in the “Username” field.
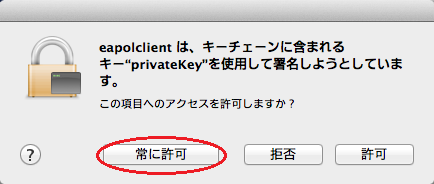
- When the message “Do you want to allow access to this item?” appears, click [Always Allow].
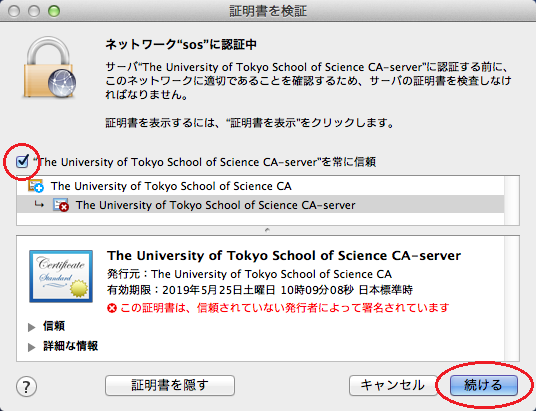
- When the “Verify Certificate” screen appears, click [Show Certificate]. Select the “Always trust "The University of Tokyo School of Science CA-server"” checkbox and click [Continue].
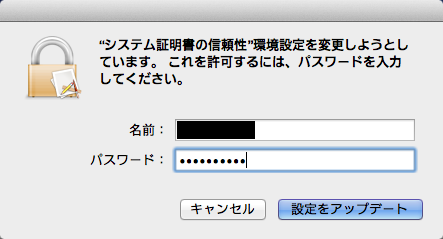
- Enter the password for the PC’s administrator account.
3 Setup for older versions
- Wi-Fi setup for Mac OS X v10.6 Snow Leopard (Japanese)
- Manual Wi-Fi setup for Mac OS X v10.6 Snow Leopard (If connection setup cannot be completed by the steps on the above page)
- For v10.5 Leopard, Wi-Fi access can be set up in almost the same manner.
