「File transfer service」の版間の差分
Shitami.junichiro (トーク | 投稿記録) |
Shitami.junichiro (トーク | 投稿記録) |
||
| 52行目: | 52行目: | ||
Access authentication is performed by using the same user certificate as for Wi-Fi authentication. The file transfer service requires no other special procedures. | Access authentication is performed by using the same user certificate as for Wi-Fi authentication. The file transfer service requires no other special procedures. | ||
| − | ※For the user certificate, see | + | ※For the user certificate, see the page [[School of Science network account]]. Note that the service does not accept a guest certificate for Wi-Fi (the guest certificate does not have Wi-Fi access to subnets within the School of Science). |
# Make sure that the user certificate is installed in the Web browser. | # Make sure that the user certificate is installed in the Web browser. | ||
2016年10月14日 (金) 16:22時点における版
Information Technology Team > File transfer service
| 日本語 |
目次
1 Service features
- Transferring files that are too large to be e-mailed!
- Transferring many files at a time!
→ Each user has a quota of 1 GB.
- Accessing files off campus!
→ Users with Internet access can upload/download files from anywhere, anytime.
- Exchanging files with external users!
→ Files are published on the Web and can be exchanged with external users.
→ Enhanced security is delivered through password protection and timed publication.
1.1 Precautions
Use this service as a file transfer tool.
The service does not offer a file sharing server and is not intended to provide users’ shared folders for long-term file storage/archiving.
2 Supported users
All faculty and students with an account for the School of Science authentication system can use the file transfer service.
3 Required environment
The service assumes that the user certificate for the School of Science network account has been installed in the Web browser. If this requirement is met, the service is accessible from anywhere and allows file uploading/downloading via the browser.
The service can be used to exchange files with those with no School of Science network account through Web Publication of a file/folder.
- ※For Mac OS users
- The service does not support Safari due to a certificate authentication bug.
- We apologize for the inconvenience. Please use another browser, such as Firefox.
4 Preparation for use
4.1 Faculty without a School of Science network account (thin client users)
The setup for the service will be done by the Information Technology Team. Apply to the Information Technology Team for the setup. No specific application form is prescribed; just notify us of your intention to use the service.
4.2 School of Science network account holders
Access authentication is performed by using the same user certificate as for Wi-Fi authentication. The file transfer service requires no other special procedures.
※For the user certificate, see the page School of Science network account. Note that the service does not accept a guest certificate for Wi-Fi (the guest certificate does not have Wi-Fi access to subnets within the School of Science).
- Make sure that the user certificate is installed in the Web browser.
- The installation procedures differ depending on the Web browser.
- Users of Firefox, Google Chrome, and Opera should click here to review the procedures.
- Access the following URL via the Web browser.
- Once the account information contained in the user certificate is confirmed, the user is automatically logged into the service.
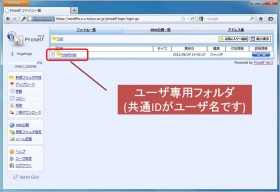
- The user’s private folder is created under the TOP folder. The user can work in the folder.
5 How to use the service
5.1 File (folder) operation
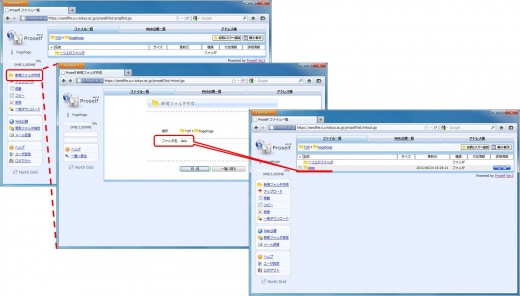
- Folder creation
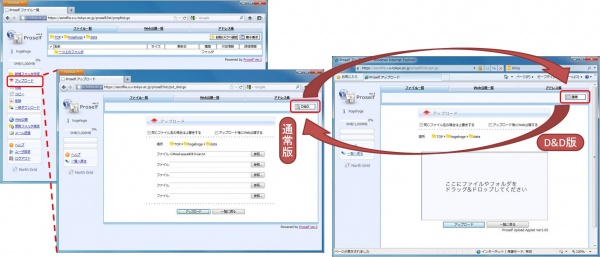
- Uploading
It has been verified that D&D does not function on Firefox/Google Chrome.
When these browsers are in use, use the “Form” method for uploading (June 30, 2011).
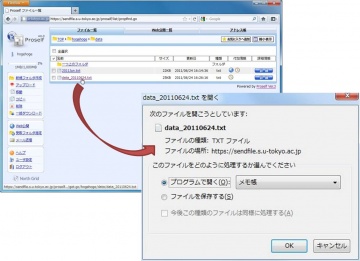
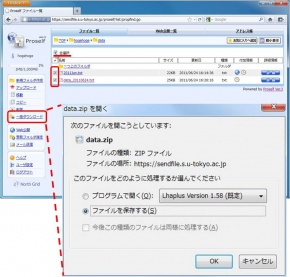
- Viewing/downloading
5.2 Web Publication
- Web Publication of a file/folder allows file exchange with external users regardless of account status.
- Transferring a file to another user
- Sender’s steps
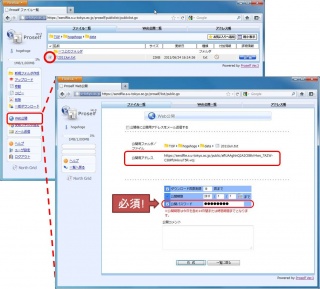
- Select the checkbox of the file to be transferred and click [Web Publication] in the left pane. The “Web Publication” dialog opens.
- Enter settings and click [Create]. Web Publication Address is generated. ※Web Publication Password must be set.
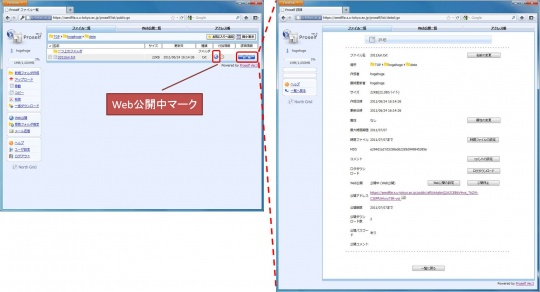
- Click [Detail] to the right of the file entry in the File List to confirm Web Publication Address or change the settings.
- Inform the receiver of Web Publication Address and Web Publication Password by e-mail or other means.
- Receiver’s steps
- Access Web Publication Address via the Web browser. When the “Login” screen appears, enter Web Publication Password to log into the “Web Publication” screen.
- In the “Web Publication” screen, check that the file you want to receive is in the list and click the file name to open or save it.
- Receiving a file from an external user (with no School of Science network account)
- Receiver (internal user)’s steps
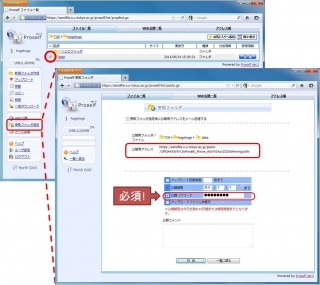
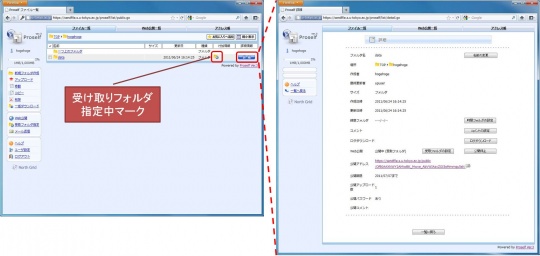
- Create Delivery Folder. With the checkbox for the folder selected in the File List, click [Delivery Folder] in the left pane to open the “Delivery Folder” dialog.
- Follow the same steps as those for Web Publication of a file. ※Delivery Folder Password must be set.
- Sender (external user)’s steps
- Access Delivery Folder Address via the Web browser. In the “Delivery Folder” screen, select the file and click [Upload].
- Inform the receiver of the upload.
5.3 Settings for Web Publication
- The default values are preset except for Web Publication Password.
○ Web Publication of a file
- Limit of download (times): No limit by default. Set the limit, if necessary.
- Web Publication Expiry Date: Up to 14 days after publication (including the publication day). No extension is allowed.
- Web Publication Password: Set a password. Password protection is mandatory.
○ Web Publication of Delivery Folder
- Limit of upload (times): No limit by default. Set the limit, if necessary.
- Publication Expiry Date: Up to 14 days after publication (including the publication day). No extension is allowed.
- Delivery Folder Password: Set a password. Password protection is mandatory.
- Hide uploaded files: This option determines whether or not uploaded files in Delivery Folder, if any, are hidden from the external user. Even if such files are visible, they cannot be viewed or downloaded.
