Wi-Fi setup for iPad
Information Technology Team > Wi-Fi connection service > Wi-Fi setup for iPad
| 日本語 |
SOS wireless LAN has been discontinued. This information is outdated.
1 Certificate installation
- Download a certificate from authentication system.
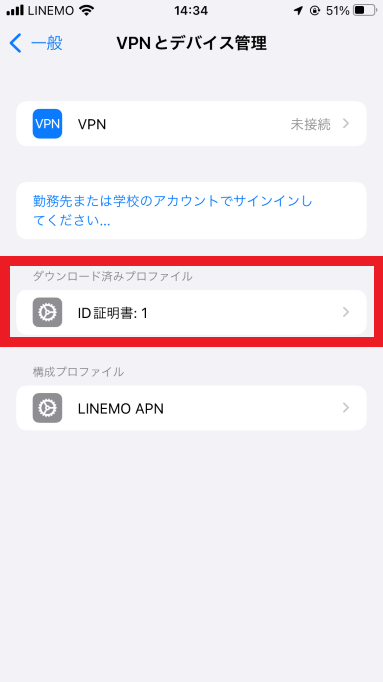
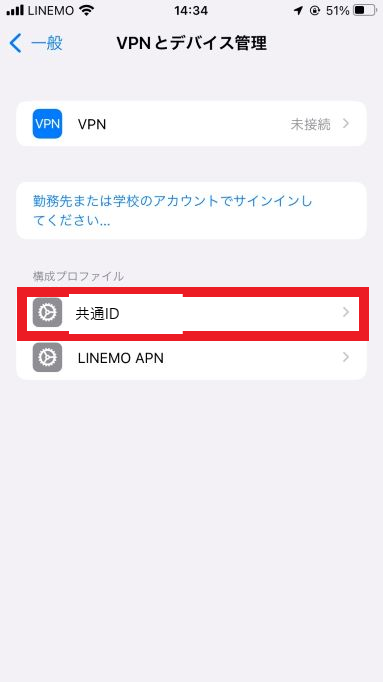
- Go to Setting>General>VPN & Device Management, You can find it in Downloaded Profile.
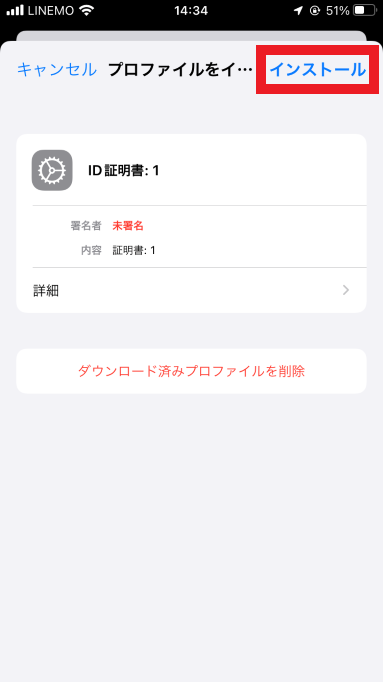
- Select and tap [Install].
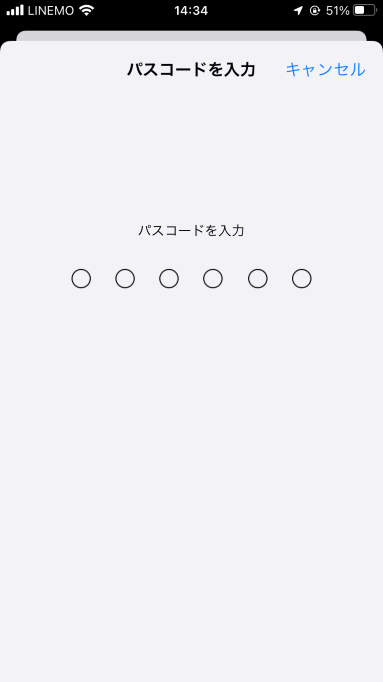
- Enter Passcode.
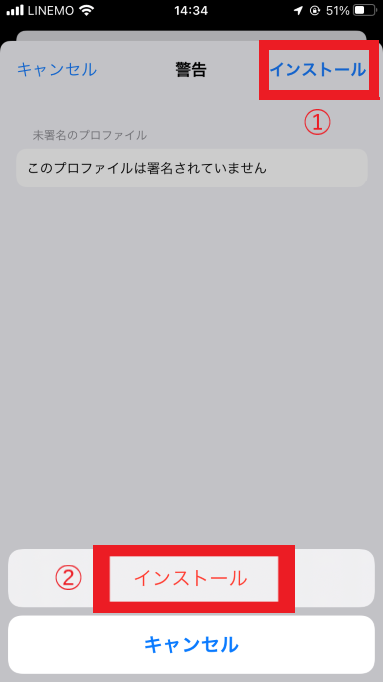
- Tap [Install].
- Enter Password which you set when downloading the certificate.
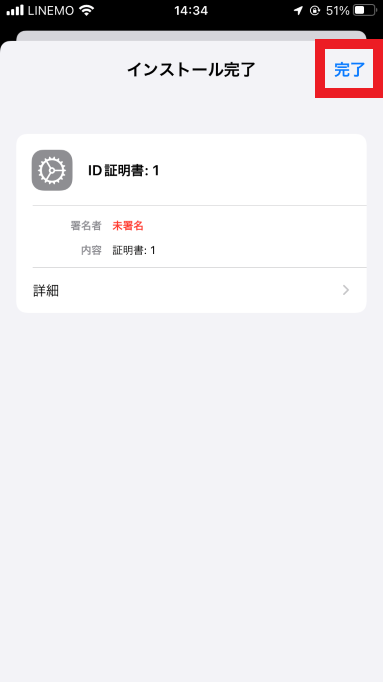
- Tap [Done].
- The certificate is now listed in Configuration Profile. It displays your ID.
2 Connection to Wi-Fi network
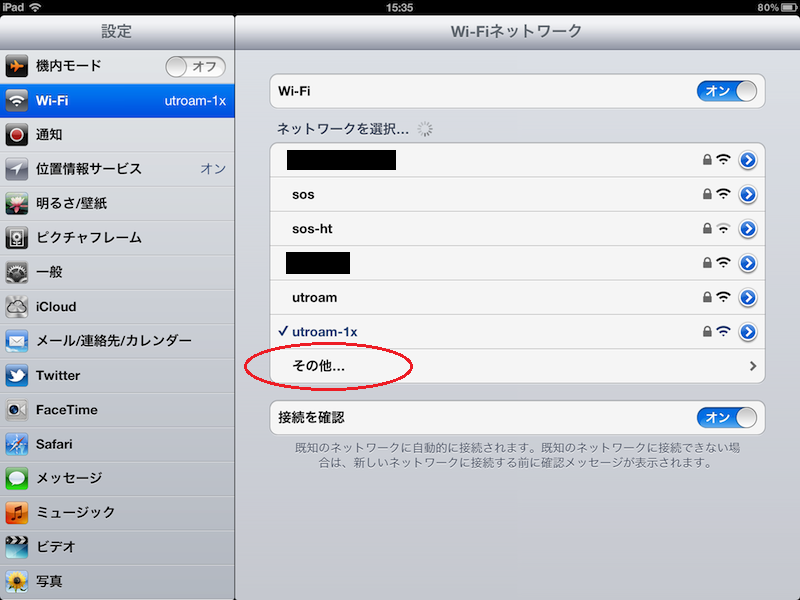
- Choose [Wi-Fi] in the “Settings” pane. In the “Choose a Network …” field, tap [Other…].
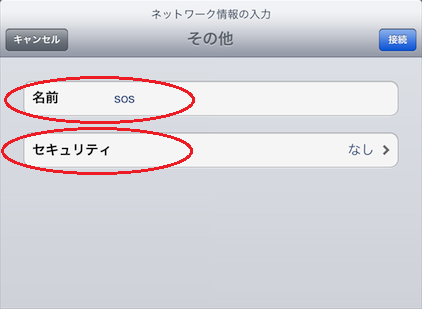
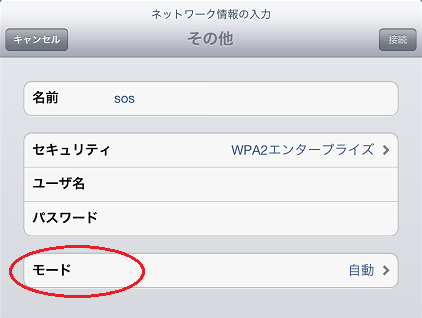
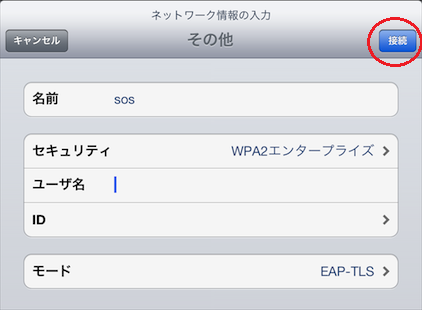
- In the “Enter network information” screen, enter “sos” in the “Name” field.
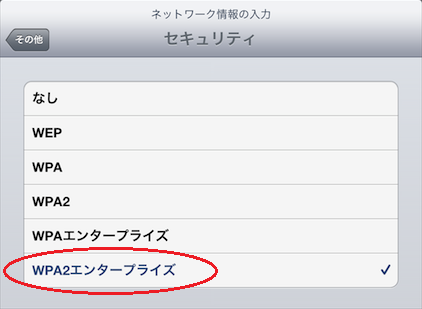
- Tap the “Security” field and select “WPA2 Enterprise”. Tap [Other Network] to return to the previous screen.
- Selecting “WPA2 Enterprise” adds setting items to the “Enter network information” screen.
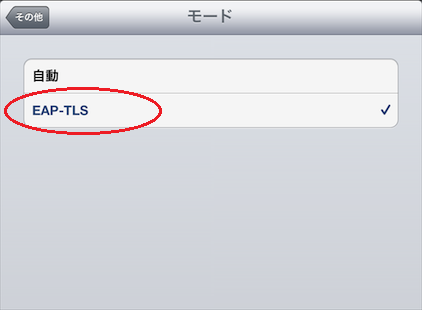
- Tap [Mode] and select “EAP-TLS”.
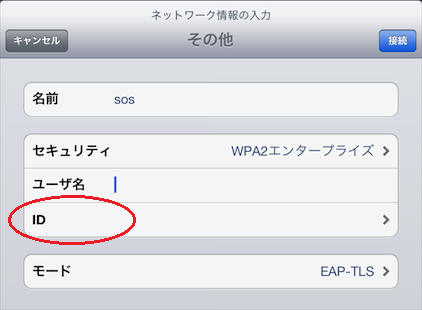
- Tap [Other Network] to return to the previous screen. The “Password” field has changed to the “ID” field.
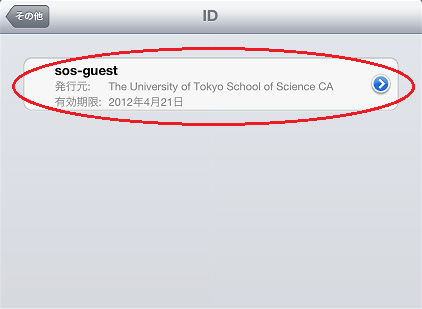
- Tap [ID] and select the installed certificate. Tap [Other Network] to return to the previous screen.
- Leave the “Username” field blank and tap [Join].
- If authentication has failed, enter the account name (10-digit Universal ID for an individual user certificate or “sos-guest” for a guest certificate) in the “Username” field.
- When the certificate is displayed, tap [Accept].
