Manual Wi-Fi setup for Windows 7
2016年10月14日 (金) 16:23時点におけるShitami.junichiro (トーク | 投稿記録)による版
Information Technology Team > Wi-Fi connection service > Wi-Fi setup for Windows 7 > Manual Wi-Fi setup for Windows 7
| 日本語 |
1 Network profile creation
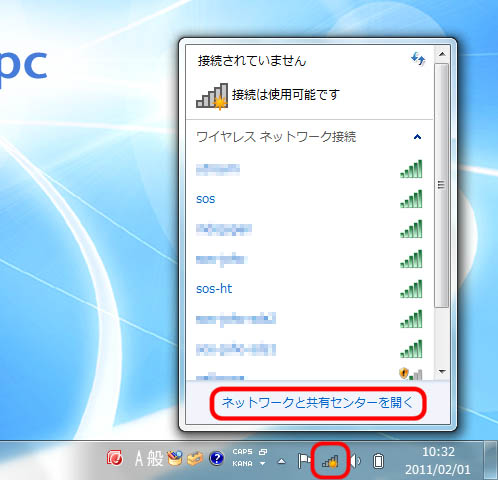
- Click the wireless network connection icon in the task tray to open the list of wireless networks. Click [Open Network and Sharing Center].
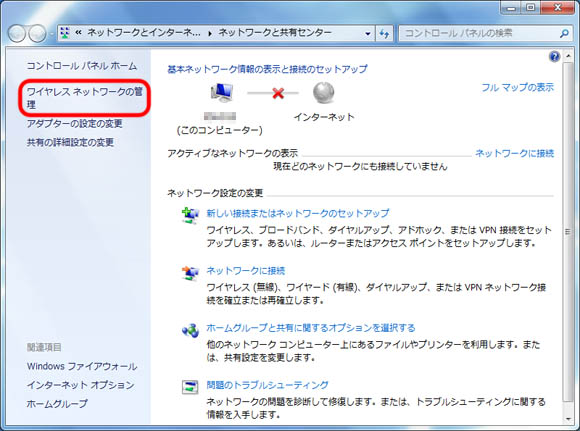
- Click [Manage wireless networks] in the left pane.
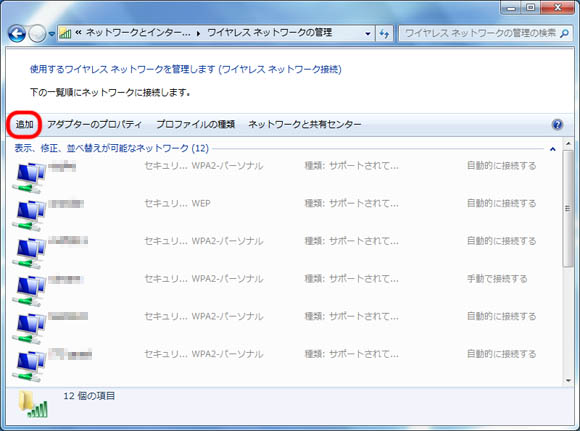
- Click [Add].
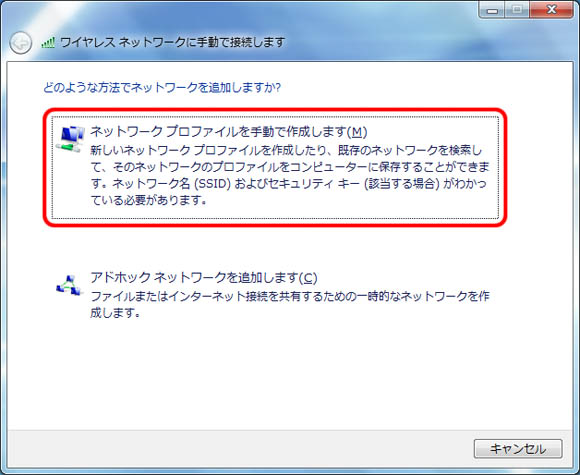
- Click [Manually create a network profile].
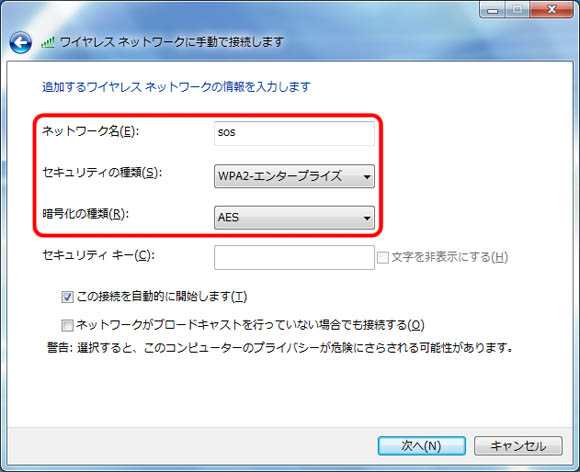
- Enter the following information and click [Next].
- Network name: sos
- Security type: WPA2-Enterprise
- Encryption type: AES
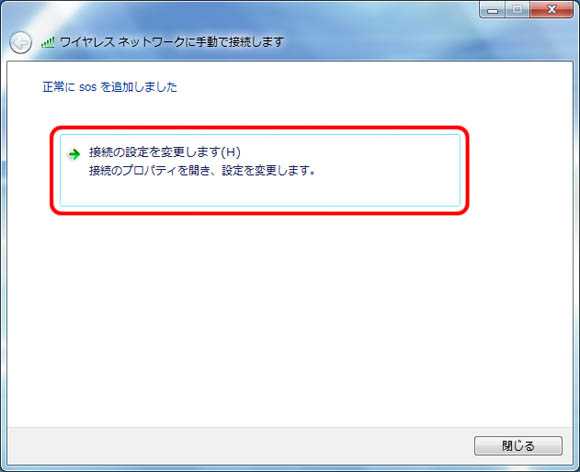
- Click [Change connection settings].
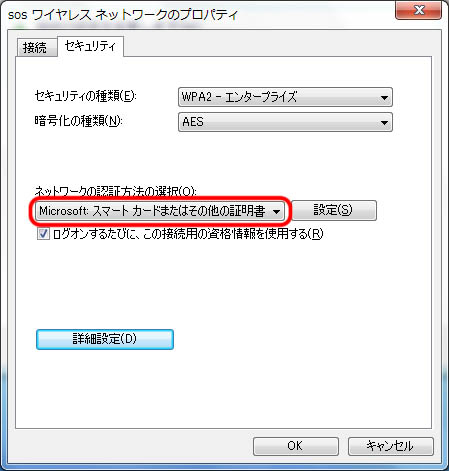
- Open the “Security” tab and set the network authentication method to “Microsoft: Smart Card or other certificate”. Then, click [OK].
2 Connection to Wi-Fi network
- After the setup is completed, the authentication process automatically starts. When a task tray balloon appears saying “Additional information is needed to connect to sos”, click it to provide additional information.
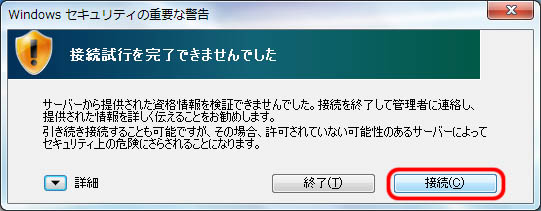
- Click [Connect] to the following alert, if it occurs.
